Managed the planned trip to Bromley and have acquired the micro switch, the headphone socket and some wiring as well as some last minute bits and bobs from homebase on the way back..
OK, so I've finished the holes for the controller as expected and am now ready to fit the buttons as a test before i do the same for the perspex over the top!
The completed lid..
Buttons go in fine, one is a bit tight and took an age to unscrew back out but I've got the right size on the adjustable hole cutter now after many trial runs..
Quick test fit of the joystick, obviously it needs bolting into place, but i thought I'd trial run it with some sellotape holding it in place just to see how it looks and feels..
Woot, i am pleased, now to get the guide button into place and then i can check the connections, speaking of which, this is what they look like inside the box..
One last close up, its not that clear, but i managed to fit the proper guide button from the Madcayz into the stick and have now got the back and start buttons screwed in properly, its all a bit tight around that joystick though!!
The semi finished article,
Well, its now just getting the power hole drilled and fitting the external jack for the headphones..
I'm totally shattered so that's it for today, time for dinner and then bed methinks..
In know the box still looks a little tatty and gappy, but remember it needs a good sand, and a proper wood fill and primer to get it all straight edged and ready for painting..
Soon my pretties, soon!!


It went in so tight i couldnt get it out! ! !
Mind the Gap!!!
Tuesday update.. Slept in late today as I was so exhausted, it meant by the time i got started on the box it was 6pm!!
My first attempt to get the holes drilled for the buttons and joystick wasn't too hot, it was my first time using this adjustable hole drill and it chews MDF like butter one second then concrete the next, not reliable me thinks....
Took a few attempts and a lot of extra sanding as i was about 2mm out on the right size to get the button in the hole!!
Button fixing time... Added my first button hole and screwed one into the panel as show below to test it out..
The first button is in and screwed into place.. You can see the guides now for the others too.. Woot..
Drilled another hole and started to fill the gaps in the sides of the box with flexible wood filler, this will make painting it smooth later a whole lot easier i think.. And I've still got 2 tubs left over from the floor filling, so i might as well use it eh..
Can you spot the seam above where the 2 pieces join! I thought not... Nice..
Hole 3 is drilled and ready for sanding, I'm dreading doing the Perspex with this hole drill, its all over the shop with the bloody battery powered drill i;m using,
I may have to borrow my sisters drill or get up in the loft and check if the mains powered one is up there, of course that means braving the monster that lives in the dark corner of my loft, the one from "The Grudge" that makes that creaking noise every time the torch isn't facing into that corner.. Creepy...
That's the final shot for today, cant really do any more drilling at 11:45pm can I, well i could but no doubt one of the neighbours would throw a shit fit..
More tomorrow..
Progress.. Slow and painful.
Well the braces to hold the top and box onto the box at the right angles are now complete..
Only now do the parts need doweling or screwing together, again I'm contemplating which is best, screwing will have to be done from inside as i want no seams or screws visible on the sides front or back, the ones under the lid will be hidden under the graphics and the ones at the bottom i don't care about...
I'll do a few test joins tomorrow and see the difference..
OK first a big shout out to "no more nails" strips!!
What a time saver on sticking down those supports, i just scisored a strip into 2 or 3 lengths and then stick one to the other!! getting it straight along a fixed line without having to drill or screw ANYTHING togther,
I'd probably stick the whole box together with these if i could, but I'm not sure about the whole 2.5kg that it says/claims it can support..
OK so i bonded the supports inside the edges to give the top and bottom something to rest and be attached to..
So here's the box with the bottom supports holding the base in place..
Front and back....
Sides...
Box together with lid balancing properly on the top supports...
and this finished article, box with graphics laid over top plate showing drill positions for buttons and stick ..
I'm keeping the graphics under my hat for the time being as i think they'll be better with a proper "real thing" reveal..
Realised i need another micro switch for the "guide button" now, so i may have to pop to Maplin tomorrow.. Gah!!!
So as usual, back with more later..
Nothing happened here today...
Beyond a bit of FIFA and mostly sleeping I didn't get anything done on the box as that overdose really caught up with me by Saturday morning, so I spent the whole day feeling terrible, and then I slept most of Sunday.. I've now halved my painkillers for a few days to give my system a chance to recover, so I had more pain, but less feeling like i was going to die..
Anyhoo, managed to make it to Homebase and back on Saturday, but felt terrible when i got back, I'm happy that I managed to get some proper 12mm wood for the internal hidden bits of the Box, i.e. the bits that join it together and hold the lid and base in place, as well as some nice acrylic paint and primer while they still had a 15% sale on..
So my plan is to start putting the box together tomorrow, properly.. Honest..
Due to a mishap with the printing, i haven't got a proper workable printout that covers a whole borderless A4 page yet, I appreciate what i've got but don't really want to use the one i did get given to me, as nice as it looks, i don't want the borders, but may have to compromise if i cant get to do the printing myself.. Time will tell, I'm sure it will all come good in the end..
Anyhoo, will post more tomorrow...
Am I livin in a box, am I livin in a cardboard.............
OK its a afternoon post as I'm off to Lee's for crappy Cthulu movies and footie..

Assembled the lot and realised that once again I've not allowed for the edges to fit AROUND the base, so the front and back are too narrow and don't reach all the way to the edge of the sides, only to the edge of the base.. Fuck Fuck Fuckity fuck, how many times will this catch me out..

Not bad if i do say so myself, ignore the wobbly edges on those cuts, i've allowed some spare "past" the cut line and sanded them down as straight and smooth as i can, later I'll use some wood filler from my floorboard project to fill in the gaps so it will be seamless.

Back for more on Saturday or Sunday then..
Byeeeeeeeeeeee...
My hands felt just like two balloons....
Not much to report, after a stupid overdose of BOTH my Tramadol and Co-Codamol, i woke up on Wednesday afternoon and immediately puked, nearly passed out,on toilet floor, and then crawled back into bed where i then spent most of the last 2 days doing a Heath Ledger (semi conscious on the bed) so obviously no progress on the woodworking..
I feel a bit better now though, but this is the second time I've doubled up on my tablets and this time they were only 2 hours apart, so I really need to find some way to control my meds, especially those i take first thing in the morning, on auto pilot, or next time I may well be "dead in the bed"..
The perspex for the lid arrived, wasn't in a padded envelope (bloody ebayers) but its pristine and covered in a removable film so its crystal clear. Still no sign of the mitre saw i ordered, hopefully tomorrow?
Nipped out to homebase today, got some new jigsaw blades to redo the MDF, we'll see if these ones cut better and the others were blunt as suspected, saw some nice other stuff there, but didn't really want to commit to anything else, as they have a 15% sale starting tomorrow, so it was more a recon mission than anything purchased.
In other news, my two copies of FIFA 09 arrived, so if I'm feeling well enough to go out I'll be booting the bladder into the onion bag tomorrow evening with Lee,
Which means I'll really have to get on with the box in the afternoon, before again I run out of daylight and end up doing something else or crawl back into bed..
See you then...
Measure twice, Cut once...!!!!!!!!!!
Yep, my fantastic measurements ensured that as soon as I cut out a cardboard template of the sides of my box just to check the button clearance, it soon became apparent that the fucking thing was completely wrong!!
It was not only too small height wise, but the angle was bringing the middle down so far that the buttons would protrude out of the bottom and through the base..
I guess it wouldn't have been too uncomfortable with the prongs of the micro switches jambed into my leg flesh.. gulp!!
So out comes sketchup again and some proper measurements and angles are calculated... And this is what we get.
A plan showing the side of the box, with correct heights, free space below button plunger and base of box... Yipee...
.
I still like this Sketchup thingy as an alternative to a cad program, i'm going to highly recommend it to all, budding designers should really give it a go, I can see where google are aiming it, its great for turning doodles into 3d objects and seems to include the experts by then exporting them to 3d rendering or cad programs too, probably not as powerful for modeling but makes sense to a non cg pro.. I havent even checked out the Pro version, this is just the free one!
Ok, plan With X ray into Removed Lid and Button top, plus perspex.. Perfect..
Also found my jigsaw is shit for cutting MDF... Arghhhhhhh, now i really want the exaktsaw, after watching it eat floorboards, it would have precision cut my stuff like butter.. Bollocks..
Decided on the final layout for the panel, and have measured it all up properly, going for the JAP style curved button Sega arcade layout, as its better on the fingers and am going to do all 8 buttons rather than the 6 button layout to incorporate the rear shoulders as well, you never know which future fighting games are going to need them and i don't want to start having to drill extra buttons into it later..
Anyhoo that's it for today, was too dark to do any proper cutting so we're off again tomorrow...
Byeee...
You want Sketchup on those?
Just a quick update, had a good look at google sketchup as an alternative to a cad package... Not too shabby once you get to grips with it.. Those with x,y,z spacial brains will get it instantly, those who just watch others rendering will find it all a bit daunting at first..
Anyhoo, a quick knockup of the controller, still needs some rounded edges and some chamfering but its mainly to get a grip on the measurements and make sure everything fits inside it..
One wireframe and one filled view..
Fairly pleased so far.. All is proceding according to my designs [/palpatine]
Night Night..
Lazy days.. Still cost money..
Ok its sunday so bit of a rest day, was up all night and we lost an hour due to the clocks going forward, so after watching the 6am Australian F1 i needed some sleep, so didnt get time to work on my box today after all..
Anyhoo, i wanted one of these "exakt saws", they cut to a set depth and you can set the blade exposure which means you could stick it against the wall and cut out a box if you wanted, or cut a plank on the floor with nothing underneith, it just seems worth it for the fact you dont need a workbench or a jigsaw protruding through the wood, and the cuts are of such a quality the back end of the wood has no splintering and you can cut plastic and tiles without any cracking... Well i cant afford one at the mo, but its def going on the shopping list for later..

For now, we'll stick to the old faithful mitre saw, i've found a nice cheap adjustable one that should help the "edging of my box", and allow me to slope the controller a bit.. Rather than just a flat square, i can give it a bit of "flavour", and "think outside of the box"... *cough*

So this is the saw i've ordered, i'll start cutting up the MDF tomorrow as long as its not pissing with rain....
Hacker for hire!!
Ok I ordered a controller online from the USA from a guy called Lee Speer (HARUMAN) at the Arcade Controlls forum I joined for info..
http://forum.arcadecontrols.com/index.php?topic=76185.0
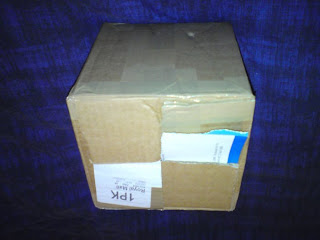
Ok so after a strange delivery from the US postal system who sent it to Indonesia by mistake instead of the UK!! the 3rd party controller has arrived and it was time to get this Madcatz rubbish checked out..
The Madcatz intact...
Get the cover off this baby and get the pcb out and stripped down and we are left with...
Not too shabby, and with a common ground its fairly easy to wire up.. this is what we should end up with..
Haruman has added some plasticy glue over the contacts to protect them..
Ok So what have i got for my money, I have the contacts done, analogues have been have been left intact but i could have nullifyed them with 5ohm fixed resistors, and shoulder buttons have been converted to digital instead of analogue triggers..
Just gotta get the connector blocks sorted and we'll get to wiring up the box panel..
Before that need to build the box.. Now i've got everything to go into it, i can get to start sizing up and sawing all that wood up..
Check back for more..
Have a look at my bits....
First of all, I guess i'll need a mask to protect my weedy lungs from the poisonous MDF dust, did anyone else know it was toxic, nope me neither, oops..


Wires and crimps for connecting to the microswitches on the arcade bits, the non crimped ends will go into the connector blocks..


A couple of mini buttons for the pad, i'm going to use these for the back and start buttons, they'll be seperated by a proper Guide button which i'll rip from the madcatz and bodge together somehow..

I decided to get a proper arcade cradle/cable to connect the stick properly, as it has a pin out connector it makes sense to use one of these rather than hard wiring it....


And so it begins...
A NEW PROJECT!! woot...
Ok, I'm sick of my 360 controller, sick of its shitty d-pad and its random analogue stick and mostly its lack of ability to let me EVER pull a fucking fireball, super or ULTRA in street-fighter4.... Sick to the back teeth..
Soooooooo, i decided to get myself an arcade stick.. Until.... The Price..
The rubbish "Madcatz" have hyped everyone into buying some new piece of tat, by putting a shit one up alongside a mega expensive one with a load of expensive Japanese parts in a madcatz box and calling them the Fightstick (the cheaper option) or the Tournament Edition. (The one you should buy!!)
Well at £80 and £150 notes I'm not that hyped after all.. And even if i could afford one, it seems they're not ALL they're cracked up to be after all....
Option 1, The Fightstick..
Whats good, not much, most people will see it as the younger brother of the TE and think its got the same bits under the hood, well it doesn't actually contain ANY arcade machine parts, the external controls and internal components are from madcatz themselves, and as such is pretty much a standard stick with cheapish clunky buttons, it doesn't review that well, it isn't easy to find, is overpriced IMHO and most people when they realise its not a patch on the TE then say you should buy it, gut it and put in a proper stick and buttons from Sanwa at extra cost.. WTF!!!
Option 2 : THE TOURNAMENT EDITION!!


The verdict...
Neither!
So i went looking, why bother buying the madcatz sticks just for the expensive parts if you could just rewire a standard 360 controller, get/build/make a box, buy the parts yourself from japan and bingo your own arcade stick... Just how you want it, and at about the same cost as the standard fightstick with superior parts to the TE..
A lot of googling, head scratching about how wireless, wired and the 3rd party (i.e. cheap) 360 controllers work, how and if i could rip one to pieces and solder it to proper arcade parts so the 360 sees it as a standard controller, how and where to get those arcade machine Sanwa and Haap associated Joysticks and Buttons from, so not much of a project really, more of a breeze!! Get bits, chuck in box, stir, add a bit of solder, bish bosh, done..
But seriously, I've investigated and found the information I need, I've got most of the skills (and what I dont have i can learn) to do the hardware work, and as such I'm ready to embark on my new project... A home made, but hopefully quality Arcade Stick for the 360!! And as such "so it begins"... More as I progress..
